
Picking
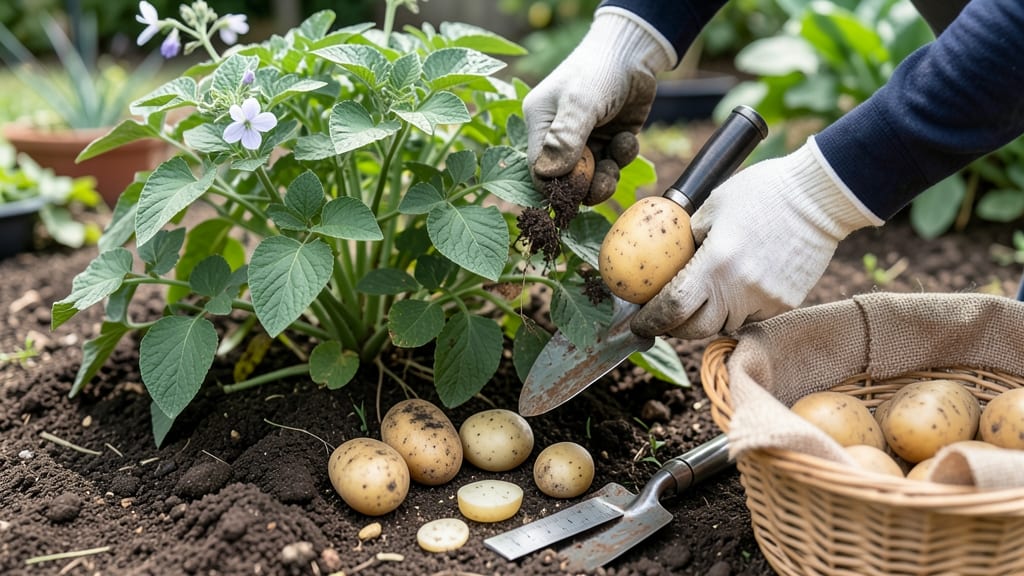
Harvesting potatoes from your garden at the right time ensures flavorful, storable tubers—not shriveled or tough ones.
Digging up potatoes too early means small yields, while waiting too long risks shriveled, tough tubers—so knowing exactly when to harvest can mean the difference between a bumper crop and wasted effort.
Look for three key signs: yellowing foliage, firm skin that resists pressure, and tubers at least 2 inches wide. These cues, along with timing based on your USDA Zone 6a climate, will help you avoid common mistakes.
Below, I’ll walk you through the step-by-step process, including how to handle early vs. late varieties and what to do if frost threatens your harvest.
3 Clear signs your potatoes are ready for harvest (with exact timing)
Harvesting potatoes at the right moment transforms your garden into a treasure trove of crisp, flavorful tubers. But timing is everything—dig too soon, and you’ll pull up tiny, underdeveloped potatoes. Wait too long, and they’ll turn shriveled or develop green, toxic skin from sunlight exposure.
The key lies in watching for three unmistakable signs that your potatoes are begging to be harvested.
First, pay attention to the flowers and foliage. Potatoes are annuals, and their above-ground growth follows a predictable lifecycle. When the yellow blooms fade and the leaves start wilting, your tubers are likely nearing peak maturity.
This shift happens naturally about 2-3 weeks after flowering, depending on your potato variety and climate.
Next, focus on the skin texture of the tubers. Ready-to-harvest potatoes develop a thick, papery skin that resists pressure from your thumbnail. If you gently press a tuber and the skin doesn’t dent easily, it’s a green light to dig.
This skin toughening protects the tuber from damage during harvest and storage.
Finally, check the soil conditions around your potato plants. When the top layer dries out slightly between waterings and the stems snap cleanly when bent (rather than bending gradually), the tubers are fully formed and ready.
These tactile cues ensure you’re harvesting at the perfect moment for maximum yield and storage quality.
🌱 3 Signs Your Potatoes Are Ready for Harvest
-
1. Flowers Fade & Foliage Yellows
Yellowing leaves and wilted blooms signal tubers are maturing underground (typically 2-3 weeks post-flowering). -
2. Skin Resists Thumbnail Pressure
Firm, papery skin means tubers are fully sized (2-3 inches) and ready for harvest. -
3. Soil Dries & Stems Snap Easily
Dry topsoil and brittle stems indicate tubers are fully formed and won’t split during digging.
Not all potatoes follow the same timeline. Early varieties like ‘Yukon Gold’ or ‘Red Norland’ mature in just 60-80 days, while late varieties such as ‘Russet’ or ‘Idaho’ need 100-120 days to reach harvest readiness. Always check your seed packet for days-to-maturity guidelines and adjust your harvest window accordingly.
Climate plays a crucial role too. In cooler regions (USDA Zones 3-5), potatoes often mature earlier due to shorter growing seasons. Conversely, in warmer zones (6-10), they may take longer.
Watch for the first frost warning in your area—potatoes can’t tolerate freezing, so harvest at least 2 weeks before frost to avoid damage.
Harvesting at the right time also affects flavor and storage life. Tubers pulled too early are starchy and bland, while those left too long become tough and woody. Aim for firm, medium-sized potatoes (2-3 inches in diameter) for the best balance of texture and sweetness.
Store them in a cool, dark place (40-50°F) with high humidity to preserve freshness for months.
One common mistake is ignoring the new potato harvest window. These tiny, tender tubers form early in the season and can be harvested as soon as flowers bloom.
Simply brush back the soil and pick the largest tubers you find—this encourages the plant to produce more, giving you a double harvest later in the season.
If you’re unsure whether your potatoes are ready, perform the soil squeeze test: Gently dig down 4-6 inches and check for tubers. If they’re smaller than a golf ball, wait another week.
If they’re larger than a tennis ball, you’ve missed the sweet spot. Timing is everything, so keep an eye on your plants and act when the signs align.
Best harvest methods to avoid damaging tubers (step-by-step guide)
Once your potatoes show those harvest-ready signs, timing and technique become critical to preserving your crop. Rough handling or improper digging methods can bruise delicate tubers, inviting rot and shortening storage life.
The good news? With the right tools and approach, you can harvest like a pro—even if you're a first-timer.
Start by choosing a dry, sunny day for harvesting. Wet soil sticks to tubers, making them prone to disease. Avoid harvesting right after heavy rain or when frost is forecasted within 48 hours. Your goal is to minimize stress on the plants while gently extracting every tuber intact.
-
Step 1: Gather Tools
Use a garden fork (not a shovel), gloves, and a large basket with soft sides. A pruning shears helps trim foliage post-harvest.
-
Step 2: Cut Foliage
Trim stems to 2 inches above tubers using shears. This reduces moisture loss and prevents sprouting during storage.
-
Step 3: Loosen Soil
Insert the fork 6 inches from the plant base at a 45-degree angle. Gently pry soil upward to avoid piercing tubers.
-
Step 4: Lift Tubers
Grasp the plant by the stems and lift gently. Shake off excess soil—don’t rub, which causes bruising.
-
Step 5: Cure Tubers
Spread potatoes in a single layer in a cool (55–60°F), dark place for 5–10 days to harden skins and heal cuts.
After harvesting, inspect each tuber for cuts or bruises. Discard any damaged ones immediately—they’ll rot faster. For long-term storage, choose a well-ventilated spot like a paper bag or wooden crate in a dark basement. Check monthly for spoilage and remove any soft or moldy tubers.
Pro tip: If you’re harvesting new potatoes (small, tender ones), dig selectively around the plant edges where tubers are closest to the surface. This lets the remaining crop continue growing for a larger yield later in the season.
With these methods, you’ll preserve the quality and quantity of your harvest, ensuring homegrown potatoes stay fresh for months. Happy digging!