Picking
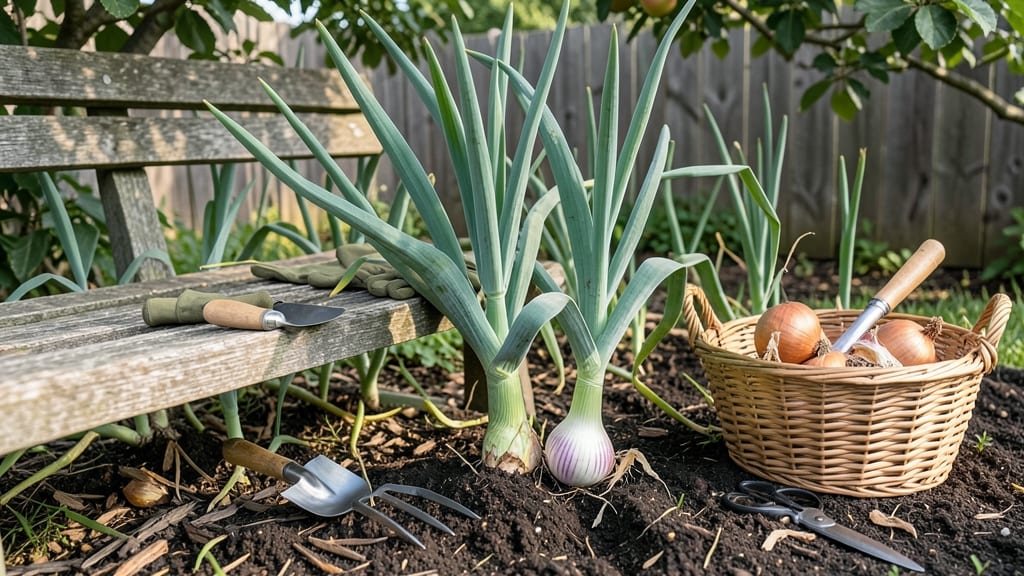
Harvesting onions from the garden at the right time ensures sweet, flavorful bulbs that store well—here’s how to know when they’re ready using simple leaf tests.
Picture this: you’ve nurtured your 🧅 plants all season, only to pull them too early and end up with small, pungent bulbs—or leave them too long and risk splitting. The difference between a perfect harvest and a disappointing one often comes down to reading the leaves.
Most gardeners wait until the tops yellow and flop over, but the truth is more nuanced. Bulb size, neck thickness, and even the time of day you harvest all play a role in flavor and storage potential.
Below, I’ll break down the five key leaf tests to pinpoint the exact moment your onions are at their peak.
You’ll also discover how climate and variety affect timing, plus post-harvest steps to keep your harvest fresh for months. Ready to master the art of onion harvesting?
5 Leaf tests to determine when onions are ready for harvest
Harvesting onions at the right time ensures the best flavor and storage life. Unlike many vegetables, onions give clear visual signals through their leaves when they're ready to pull. These leaf tests work for both storage onions and green onions, though the timing differs slightly between varieties.
The key is watching for these five specific changes in your onion foliage and bulbs.
Green onions (also called scallions) and storage onions mature at different rates, but both rely on leaf color and bulb development as reliable indicators. For storage onions, you want bulbs that are fully mature but not overripe, while green onions should be harvested when they reach your desired height.
Understanding these visual cues prevents you from pulling onions too early (resulting in small, pungent bulbs) or too late (leading to soft, sprouted onions).
- 1 Leaf Color Test: Storage onions show yellowing tops that flop over, while green onions develop hollow stems (3-4 inches tall).
- 2 Bulb Diameter Test: Storage bulbs should reach 2-3 inches in diameter (check by gently digging around the base).
- 3 Neck Shrinkage Test: The stem neck should shrink to about ½ inch wide at the bulb's top (signals maturity).
- 4 Skin Texture Test: The bulb's outer skin should feel dry and papery (not slick or green).
- 5 Wilting Test: Leaves should wilt completely (storage onions) or reach 12-18 inches tall (green onions) before harvest.
Start with the leaf color test—this is the most obvious signal for storage onions. When the green tops turn yellow and begin to flop over, it's a clear sign the bulb below is mature.
For green onions, focus on stem thickness and height instead. These onions don't form bulbs, so you'll harvest them when the stems reach your preferred size, typically 3-6 inches tall and ¼-inch thick.
The bulb diameter test is crucial for storage onions. Gently dig around the base of the plant to check bulb size—aim for 2-3 inches in diameter. Smaller bulbs (under 1 inch) will store poorly and taste bitter.
If you're growing short-day onions (like Texas Sweet or Grano), these often mature earlier than long-day varieties (such as Yellow Sweet Spanish or Copra). Adjust your harvest timing based on your specific variety.
Pay close attention to the neck shrinkage test, which many gardeners overlook. The stem where the leaves meet the bulb should shrink to about ½ inch wide. This indicates the bulb has stopped growing and is ready for harvest.
If the neck remains thick, the bulb isn't fully mature yet. For green onions, this test doesn't apply, but you can still check for hollow stems, which signal readiness.
Don't ignore the skin texture test—this is your final quality check. A mature onion bulb should have a dry, papery skin, not a slick or green surface. If the skin is still tight and green, the bulb needs more time.
Conversely, if the skin is soft or wrinkled, the onion may have been in the ground too long. For storage onions, this dry skin is essential for long-term storage success.
The wilting test is the last confirmation before harvest. For storage onions, the entire top should wilt and fall over. For green onions, the leaves should be fully elongated (typically 12-18 inches tall) but still firm.
If you harvest too late, storage onions may split or rot, while green onions will become tough and woody. Timing is everything!
Pro tip: Harvest storage onions on a dry, sunny morning when the bulbs have had time to dry slightly. This reduces rot risk during curing. For green onions, you can harvest multiple times throughout the growing season by cutting the stems just above the bulb.
This encourages regrowth for a continuous harvest.
Remember, regional climate affects harvest timing. In cooler zones (like USDA Zone 4-5), onions may mature 2-3 weeks later than in warmer zones (Zone 7-8). Always adjust your expectations based on your local growing season. With these five leaf tests, you'll never guess when to harvest onions again!
How to harvest onions without sacrificing flavor or storage life
Timing your onion harvest correctly ensures maximum sweetness and long-term storage potential. Harvest too early, and you'll get small, pungent bulbs. Wait too long, and they'll split or spoil.
The key lies in leaf color, bulb size, and neck diameter—all signs your onions are begging to be picked! I’ve learned the hard way that rushing the process leads to bitter flavors and poor storage life.
Start by checking your onions in the early morning when temperatures are cool. This reduces stress on the plants and gives you the clearest picture of their readiness. Use a sharp garden knife or clean pruners to avoid damaging the bulbs.
Never pull onions by their tops—this can tear the skin and invite rot. Instead, cut the tops 1-2 inches above the bulb to allow them to cure properly.
⚠️ callout-warning
⚠️ Common Harvest Mistake: Waiting for Leaves to Completely Die
Onions are ready when 50-60% of leaves turn yellow, not when they’re completely brown. Overripe onions lose flavor and storage quality. Short-day varieties (like Texas Early White) mature faster than long-day varieties (like Yellow Sweet Spanish). Ignoring this can mean bulbs that split or rot before you even store them!
After harvesting, let onions cure in the sun for 3-5 days to toughen their skins. Spread them on a clean mesh screen or paper towels in a dry, shaded area. Avoid direct sunlight to prevent scorching.
Once cured, trim the roots to ½ inch and store in a cool, dark place with good airflow, like a mesh bag or wooden crate. Properly cured onions can last 6-8 months!
If your onions start to sprout or soften during storage, they’re past their prime. This usually happens when humidity is too high. To fix it, move them to a drier location or place a silica gel packet nearby.
For green onions, harvest when the leaf blades reach 6-8 inches—they don’t need curing. Simply trim the roots and store in the fridge for up to 2 weeks.
One trick I swear by is harvesting in batches if you have a large crop. Pull 10-20% of the plants first to test flavor and storage potential.
This way, you can adjust your timing for the rest. Storage onions (like Walla Walla) need full maturity, while fresh-market onions (like Red Baron) can be harvested earlier for milder taste.
Remember, climate matters. In hot, dry regions, onions may mature faster and need more frequent checks. In cooler climates, they’ll take longer. Always prioritize leaf color over calendar dates—your onions will thank you with sweeter, longer-lasting bulbs! 🧅