
Container Gardens
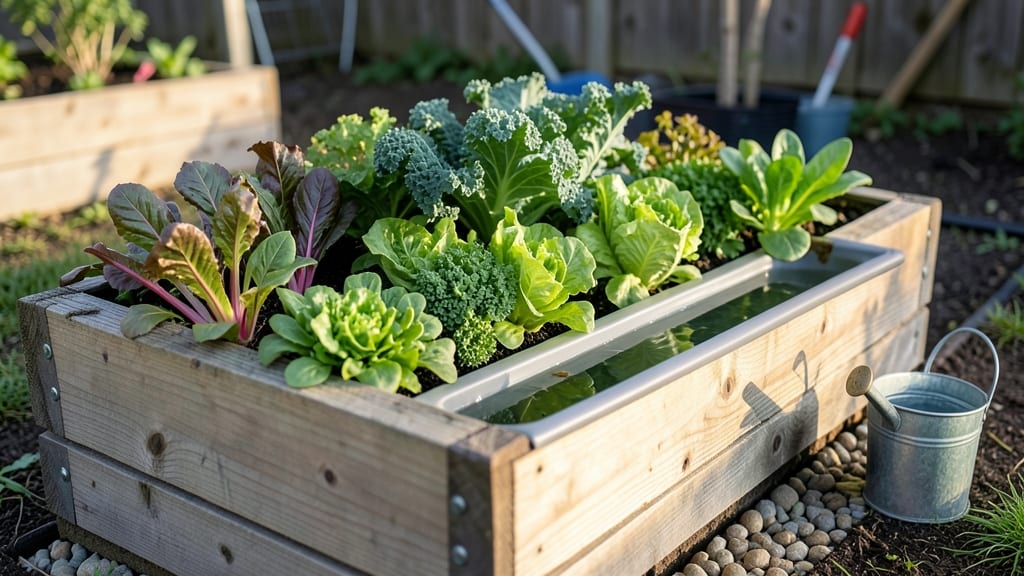
Repurposing old water troughs into raised garden beds turns wasted space into a lush, low-maintenance garden 🌱—perfect for small yards, balconies, or even patios.
If you’ve ever stared at a cluttered corner or a tiny patch of yard and wondered how to fit in more greenery, this is your answer. Water troughs hold soil, retain moisture, and create built-in irrigation—no extra work needed. Plus, their rustic charm blends seamlessly with modern or cottage-style gardens.
Below, I’ll show you 7 space-saving layouts that maximize every inch, from vertical stacks to corner huggers, plus the key modifications to keep plants thriving without the hassle of traditional beds.
You’ll leave here with a clear plan to transform your troughs—whether you’re growing herbs, veggies, or flowers—while saving water and cutting down on weeding.
How to convert water troughs into functional raised garden beds
Repurposing water troughs into raised garden beds is a fantastic way to create a functional, space-saving garden without breaking the bank. These sturdy containers are perfect for growing herbs, leafy greens, and shallow-rooted vegetables while adding rustic charm to your outdoor space.
The key lies in proper preparation—ensuring drainage, soil quality, and structural stability to support healthy plant growth.
Before diving into modifications, choose troughs made from food-safe materials like plastic or treated wood. Avoid metal troughs unless lined with a protective barrier, as they can heat up and harm plant roots.
The right depth and width will determine which plants thrive, so measure your space and select troughs that fit your layout while accommodating root growth.
Now, let’s break down the process into clear, actionable steps to transform your troughs into thriving garden beds. Proper preparation ensures your plants grow strong and your garden stays healthy for years to come.
Remove any debris, algae, or old paint. Scrub plastic troughs with soapy water and disinfect with a 10% bleach solution (1 part bleach to 9 parts water). For wood, sand rough spots and treat with a non-toxic wood sealant to prevent rot.
Use a 1/4-inch drill bit to create holes in the bottom of each trough. Space them 6-8 inches apart to allow excess water to escape while retaining moisture. Add a landscape fabric layer over the holes to prevent soil from washing out.
Line the trough with cardboard or burlap to block weeds and stabilize the soil. For deeper troughs (12+ inches deep), add a 2-inch layer of gravel or broken pottery at the bottom to improve drainage and aeration.
Use a lightweight, well-draining potting mix blended with compost or aged manure (20-30% compost by volume). Avoid garden soil, as it compacts easily and suffocates roots. For troughs 6-8 inches deep, a mix designed for container gardening works best.
Secure troughs to prevent tipping, especially in windy areas. Use L-brackets or heavy-duty zip ties to anchor them to a fence, wall, or deck. For long troughs, add support beams or cinder blocks underneath at intervals to distribute weight evenly.
Choose plants with root systems that match your trough’s depth. Shallow-rooted crops like lettuce, herbs (basil, thyme, parsley), and radishes thrive in 6-8 inch troughs. Deeper troughs (12+ inches) can support tomatoes, peppers, or dwarf fruit trees.
For water efficiency, install a drip irrigation system or wicking line along the trough’s edge. This ensures consistent moisture without overwatering. Place a water reservoir or saucer beneath the trough to catch runoff and reuse it.
Top the soil with 2-3 inches of mulch (straw, wood chips, or shredded leaves) to retain moisture, suppress weeds, and regulate soil temperature. In cold climates, wrap troughs with burlap or frost blankets during winter to protect roots.
Once your troughs are prepped, it’s time to plant! Start with fast-growing, shallow-rooted plants like lettuce or microgreens to test your setup. Monitor soil moisture closely, as troughs dry out faster than in-ground beds.
Water deeply in the morning to reduce evaporation and fungal risks. Within weeks, you’ll see lush growth and a garden that’s as functional as it is beautiful.
For long-term success, replenish soil nutrients every 3-4 months with compost or a balanced organic fertilizer. Rotate crops annually to prevent soil depletion and pests. With these steps, your water trough
7 Space-saving water trough garden bed layouts for small yards
Small spaces shouldn’t limit your gardening dreams! Water trough raised garden beds are perfect for balconies, patios, and tight yards because they’re durable, water-retentive, and customizable. Whether you have a sunny corner or a shady balcony, these layouts maximize your growing area without sacrificing aesthetics.
I’ve tested these designs in my own urban garden, and they’ve transformed even the coziest spaces into lush, productive mini-paradises.
These layouts focus on vertical space, modular arrangements, and plant pairings that thrive together. From stacking troughs to creating corner nooks, each design is tailored to fit different light conditions and gardening goals—whether you’re growing herbs, veggies, or flowers.
The key is choosing complementary plants with similar water and sunlight needs to simplify care.
⚠️ CRITICAL NOTE: Always ensure your troughs have proper drainage holes (or drill them yourself) to prevent root rot. Line the bottom with landscape fabric to block soil from clogging drainage while allowing water to flow freely. This small step makes all the difference in keeping your plants healthy long-term.
My favorite layout is the vertical stack—it’s perfect for balconies and adds a modern touch while maximizing growing space. I pair cherry tomatoes (top tier for sunlight) with thyme (middle tier for fragrance) and basil (bottom tier for shade tolerance).
This combination thrives together and makes harvesting a breeze. Plus, the vertical design adds visual interest to any space.
For shady areas, the shade nook layout works wonders. Spinach and cilantro love cooler conditions, while ferns add a lush, tropical feel. Just remember to mulch heavily to retain moisture—shady troughs dry out faster than you’d expect. I’ve seen this setup