Tools
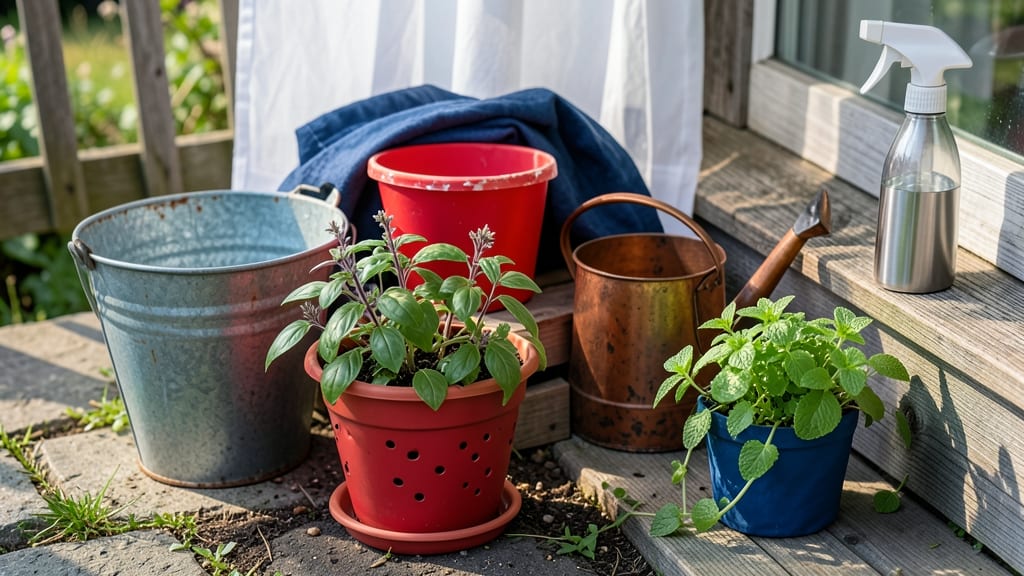
Learning bucket gardening 101 unlocks a world where you can grow fresh herbs, crisp veggies, and vibrant flowers without a sprawling yard.
Struggling to grow fresh herbs or veggies in a cramped apartment or tiny backyard? Bucket gardening transforms limited spaces into thriving green oases with minimal effort.
Whether you're a city dweller with a balcony or a suburbanite with a small patio, this method lets you take control of your harvest—no green thumb required.
Here’s the best part: you don’t need fancy tools or expensive setups. With just a few basic supplies—a sturdy bucket, well-draining soil, and your favorite plants—you can start growing in less than an hour.
I’ll walk you through selecting the right containers, picking the perfect plants for small spaces, and keeping everything healthy with simple care tips.
By the end, you’ll know exactly how to avoid common mistakes (like overwatering or poor drainage) and troubleshoot issues before they derail your garden. Ready to turn those empty buckets into a bountiful harvest? Let’s get growing!
How to set up your first bucket garden for maximum growth
Transforming a small balcony or patio into a productive garden starts with bucket gardening. This space-efficient method lets you grow fresh herbs, veggies, and flowers without a traditional garden bed.
The key? Choosing the right containers, soil, and plants to maximize growth in limited space. Let's dive into the essential steps to create your thriving 5-gallon bucket garden today.
I started my bucket garden with just two 5-gallon buckets and a handful of herbs. Within weeks, I had lush basil and thriving peppers—proof that even tiny spaces can yield big harvests. The secret lies in proper setup, which begins with selecting the right containers and ensuring optimal drainage.
Skip these steps, and you risk root rot or stunted plants. Let's get your garden off to the right start.
- Step 1: Choose the Right Containers
- Use 5-gallon buckets (standard for most veggies/herbs)
- Opt for plastic or fabric grow bags (lightweight and breathable)
- Ensure containers have drainage holes (or drill them yourself)
- Step 2: Create Drainage Solutions
- Add a 1-inch layer of gravel or broken pottery at the bottom
- Place a mesh screen over holes to prevent soil loss
- For no-holes buckets, use self-watering systems with a reservoir
- Step 3: Prepare the Perfect Soil Mix
- Mix 60% potting soil, 30% perlite, and 10% compost
- Add worm castings (1 cup per 5 gallons) for nutrients
- Avoid garden soil—it compacts and blocks drainage
- Step 4: Select Compatible Plants
- Choose compact varieties (e.g., bush beans, dwarf tomatoes)
- Avoid heavy feeders like corn or squash in small buckets
- Group plants with similar water/sun needs together
- Step 5: Gather Essential Tools
- Hand trowel for planting
- Watering can with rose attachment
- Pruning shears for maintenance
- pH testing kit (ideal range: 6.0–7.0)
- Step 6: Position for Optimal Sunlight
- Place buckets on a stable, elevated surface (e.g., deck, table)
- Ensure 6+ hours of sunlight daily for most veggies
- Rotate buckets weekly for even growth
Your bucket garden setup should now have everything it needs to thrive. The next critical step is planting. Start with seedlings (like tomato or pepper plants) or direct-sow seeds (such as basil or lettuce) into your prepared containers.
Remember, smaller containers dry out faster, so monitor soil moisture closely during hot days. I like to stick my finger an inch into the soil—if it feels dry, it's time to water.
One of my biggest bucket gardening wins was growing cherry tomatoes in a 5-gallon bucket. The key was using a cage support and pruning regularly to keep the plant contained. Within three months, I had enough tomatoes for salads every week!
The same principle applies to herbs—basil and cilantro thrive in buckets when given enough sunlight and consistent watering. Don't be afraid to experiment with different plants to see what works best in your space.
For maximum growth, consider adding a slow-release fertilizer at planting time. Look for a balanced 10-10-10 or 5-10-10 formula designed for containers. These nutrients will feed your plants steadily over 2–3 months, reducing the need for frequent feeding.
I also recommend labeling your buckets with the plant name and date planted—this saves time when it's time to rotate crops or troubleshoot issues.
Let's talk about watering strategies, because this is where many beginner bucket gardeners go wrong. Unlike in-ground plants, container gardens require daily checks during hot weather. Water deeply until it drains from the bottom, then let excess water escape completely.
This prevents root rot while ensuring your plants get the moisture they need. I set a reminder on my phone for morning watering—this gives plants a full day to absorb water before evening cools down.
Finally, don't forget about pest control in your bucket garden. Without natural predators, bugs can move in quickly. I've had success with neem oil spray for aphids and row covers for cabbage moths. Regularly inspect leaves for signs of pests, and remove any affected foliage immediately.
A healthy bucket garden starts with vigilant care—just 10 minutes of daily attention can prevent major issues down the road.
With your bucket garden now set up, you're ready to enjoy fresh produce all season long. The beauty of this method is its flexibility—you can move your garden indoors during cold snaps or experiment with different plants each season.
Start small, keep track of what works, and soon you'll be harvesting like a pro. Happy growing!
Best plants for bucket gardening: what thives in small containers
Bucket gardening opens doors to growing fresh produce and fragrant herbs without needing a traditional garden bed. The key is selecting compact, high-yield plants that adapt well to confined spaces. Whether you're growing on a balcony, patio, or windowsill, these top performers deliver big results in small containers.
I’ve tested these plants in 5-gallon buckets and found they thrive with proper care. Herbs like basil and cilantro grow quickly, while cherry tomatoes and peppers produce abundant harvests.
Flowers like nasturtiums even deter pests naturally, making them a dual-purpose choice. Let’s dive into the best options for your bucket garden!
| Plant | Sun Needs | Water Needs | Mature Size | Harvest Time |
|---|---|---|---|---|
| Basil | Full Sun (6+ hrs) | Moderate (daily in summer) | 1–2 ft tall | 4–6 weeks |
| Cherry Tomatoes | Full Sun (8+ hrs) | High (deep watering) | 3–5 ft tall | 60–85 days |
| Peppers (Jalapeño) | Full Sun (6–8 hrs) | Moderate (weekly) | 2–3 ft tall | 70–90 days |
| Nasturtiums | Partial Sun (4–6 hrs) | Low (dry soil) | 1–2 ft tall | 6–8 weeks |
| Cilantro | Partial Shade (4 hrs) | Moderate (keep moist) | 1–1.5 ft tall | 3–5 weeks |
For herbs like basil and cilantro, I recommend harvesting leaves regularly to encourage bushier growth. These plants are fast growers and perfect for beginners. Cherry tomatoes and peppers need a bit more attention—prune suckers and stake them for support as they grow taller.
Don’t forget to rotate your buckets every few weeks for even sunlight exposure!
If you’re growing flowers like nasturtiums, they’re not just beautiful—they repel pests naturally. Plus, their edible leaves add a peppery kick to salads. For year-round production, consider overwintering buckets indoors near a sunny window. Just reduce watering during dormancy to prevent root rot.
Pro tip: Use self-watering buckets with a reservoir at the bottom to maintain consistent moisture. This is especially helpful if you travel or forget to water daily. With the right plants and care, your bucket garden can yield harvests all season long—even in the smallest of spaces! 🌱